|
|
|
|
|
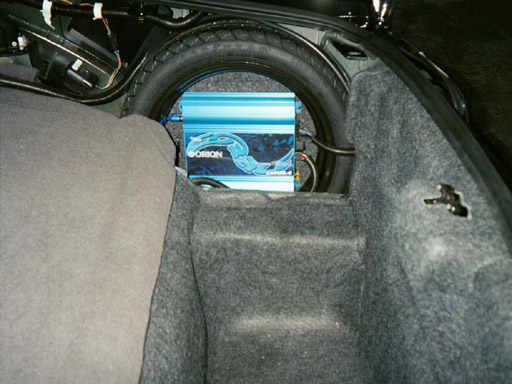
Mounting Amp In Inverted Spare Tire:
Mounting the amp in the inverted spare tire location is NOT difficult. Here are the step by step instructions:
-Remove jack and spare tire from stock location.
-Make a round amp board, out of 1/2"-3/4" MDF baord, approximately 14" round. (It's actually just a little larger, so measure carefully). Cut another circle in the amp board approximately 5" in diameter for access to the screw that holds the spare in place. You should now have a donut shaped board.
-Carpet the amp board with standard speaker box carpet and spray adhesive. Spray the board AND the carpet according to the instructions on the can, and then install the carpet on the amp board.
-You will need to make a couple of spacers to go between the amp board and the bolt holes on the spare tire. I just used a couple of scraps from making the amp board and made 4, 2" square squares and then mounted those to the back of the amp board. This will allow you mount the amp board to the spare by using wire ties.
-To mount the amp board to the spare tire, you will need STRONG wire ties. I used wire ties rated at 50 Lbs. each (Available at Home Depot). Drill 2 holes on each side of the amp board to run the wire ties through. Install the wire ties through the drilled holes and then secure the ties to the "spokes" of the spare tire. The amp board should now be securely attatched to the spare.
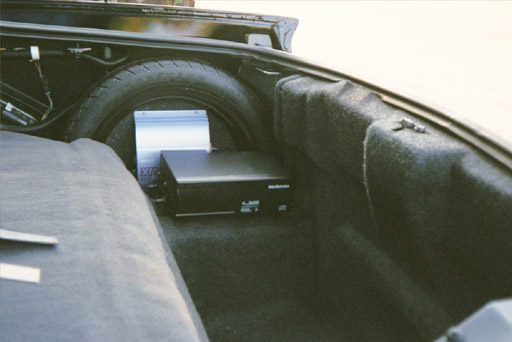
-ONLY MOVE THE JACK IF YOU'RE ALSO RELOCATING THE CHANGER TO THE PASSENGER SIDE! If you're NOT moving the changer, relocating the jack is NOT necessary! There is plenty of room to mount the jack BEHIND the spare tire, just be VERY careful because the rear quarter panel is NOT protected and you could dent/dimple it if you're not careful. I wrapped my jack in left-over speaker box carpet and then used more 50 Lb. wire ties to tie it down to the same bracket that holds the hook that the spare tire mounts to. SECURE the jack well so it won't move and hit the rear quarter panel.
There is a pic below that also shows where the jack is mounted when the spare tire is removed. The 2nd amp in my system is actually mounted beside the jack.
-Mount the amp on the amp board, screw it down to make mounting holes, then take the amp off in preparation for the spare tire mounting.
-You can now install the spare tire, inverted of course, back into the stock location. The hook that holds the spare in position needs to be cut to allow the amp to be mounted to the amp board. Just use a hacksaw to cut off the excess. I, however, did not want to cut my stock hook, so I took it to Home Depot and matched it to another hook of similar size, and also bought the bolts to go with the new hook. I think the total came to around . I then cut the new hook and used it to mount the spare securely.
-After the spare is securely installed, the amp is the last thing to be installed. I STRONGLY suggest that all the wires should have been run before this step so that the amp's settings can be made BEFORE final installation.
-Install the amp using small screwdrivers to screw the amp back down to the pre-made holes in a previous step. This WILL take A LOT of patience!
-Install wires and RCA cables.
-In case of of flat tire and you need the spare and jack, all you need to do is then cut the wire ties holding the amp board in place, set the amp installed on the amp board aside, and then you can get to your spare and jack as needed. The only downside to this method is that you have to then go through the steps above to remount the amp after your "emergency" is over.
|
|
|
|
|
Mounting Factory Monsoon CD Changer On Passenger Side Instructions (Original Sony Amp Shown):
Items needed:
-CD Changer Harness From www.radiosandmore.com
( $ 41.75 INCLUDING Shipping )
-Spare Tire Panel From www.speedautomotive.com
( $ 20 + Shipping )
Instructions:
-Unplug and then unbolt the factory changer from its stock location.
-Remove Head Unit and Plug in new changer harness.
-Run new changer harness down the passenger side of the car and into the spare tire well.
-Relocate jack behind the spare tire using 50 lb. wire ties (Available from Home Depot). Wrap the jack in carpet or sound deadening material, and make sure it's VERY secure. If it comes lose, it will ding/dent the rear quarter panel.
-There are TWO methods for mounting the changer on the passenger side:
1)Drill a hole and then bolt the changer down in the same fashion that it was on the driver side, or
2)If you don't want to add holes to your car, it will take a little more engineering, but this is how I did it. Take a scrap of wood left over from making the amp board and make a shelf to place the changer on (I also carpeted this shelf). Using radio backstraps, fabricate a bracket to mount the changer on the left side and then you can just use the same factory bolt hole on the right side of the changer to attatch it to the shelf. After the chagner is securely attatched to the shelf, make another bracket out of a radio backstrap that attatches to the shelf and then the other end can be bolted down with the same bolt that originally held the jack in place...just make sure you use spacers. The changer shold now be securely mounted.
-Plug in the new changer harness, and everything should work the same as before.
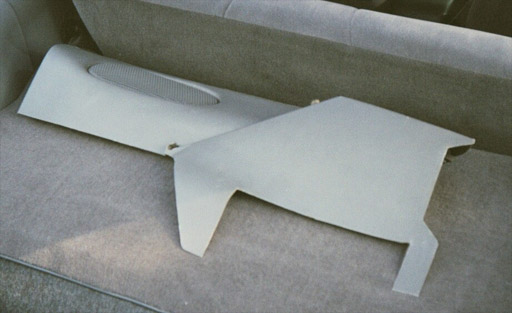
-Now you need to cut the spare tire panel to fit over the changer. Below is what the panel looks like AFTER its been cut:
|
|
|
|
|
-Reinstall the spare tire panel and you now have full access to your changer on the passenger side.
|
|
|
|
|
Component Speaker Mounted In Stock Location Instructions:
This method can be used if mounting a 6.5"S mid or 5.25" mid in the stock speaker location.
Items Needed (If using 5.25" Components):
-Scosche 6.5"S - 5.25" Speaker Adapters
-5.25" Component Speaker Set
This is really a VERY basic mod. The ONLY reason I went with 5.25" components instead of the 6.5"S that the stock speaker locations can accomodate is because I wanted to mount BOTH the mid and tweeter behind the factory grill in the stock location. IF my plan to use the bracket to mount the tweeter in front of the mid didn't work, then I knew there would be room to mount the 5.25" mid and .75" tweet side by side in the stock location if I so desired.
UPDATE: I have now upgraded to 6.5"S MB Quart Components (QM218.03CX). A Picture of the original 5.25" MB Quart Component Install can be found on my "Misc. Pics." Page
Instructions:
-If you're using 5.25" Components, mount the mid in the Scosche 6.5"S - 5.25" Adapter Plate.
-Obtain a pair of radio back straps. (A local stereo store gave me a pair for the asking).
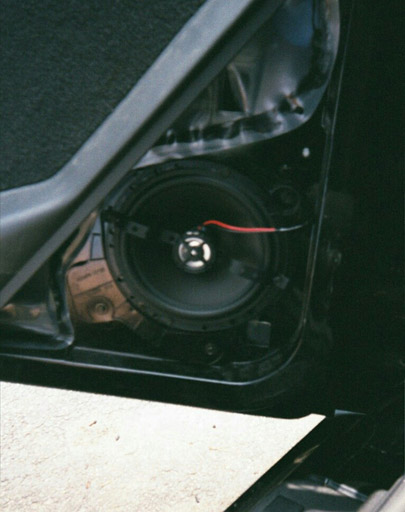
-With the mid mounted in place to the factory "pod" in the door, mold the radio backstraps so that the brackets will clear the surround on the mid. Similar in shape to this:
______/ ____________/ _______
The tweeter will mount between the 2 "peaks".
-(Optional) After the brackets have been formed, paint them black.
-Mount the tweeter on the bracket.
-Mount the bracket in front of the mid using 2 of the mounting screws that are securing the mid in place.
-AFTER the tweeters are mounted, you can then see where you need to drill a hole to run the tweeters speaker wire.
-Run the mid/tweet speaker wire through the factory door jamb slots and mount the external x-overs under the dash on the driver side and in the kick panel on the passenger side.
-Run the speaker wires to your amp, and you're in business.
|
|
|
|
|
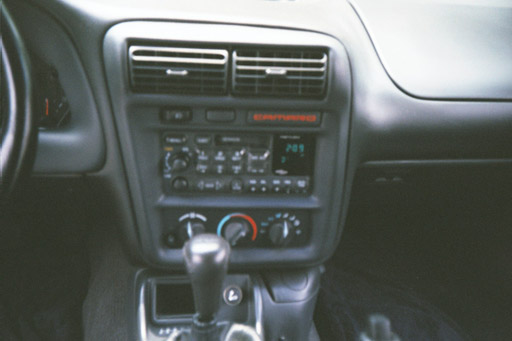
Adding An Amp To The Optional Monsoon Sound System:
Product Needed: PAC OEM-1 (With PAC's ADD-GM21C Harness)
The PAC OEM-1 is a simple "plug and play" adapter that plugs directly between the Monsoon Head Unit and the factory wiring harness. The PAC OEM-1 then gives you a front and rear pair of RCA outputs as well as an amp turn-on lead. The PAC OEM-1 also gives you 4 gain controls to control the output of each RCA level, up to a max. of 4 volts. The unit can be expensive and the only online retailer that I'm aware of that carries them is:
www.tune-town.com
|
|
|
|
|
PAC OEM-1 (Plugs In BEHIND Head Unit)
|
|
|
|
|
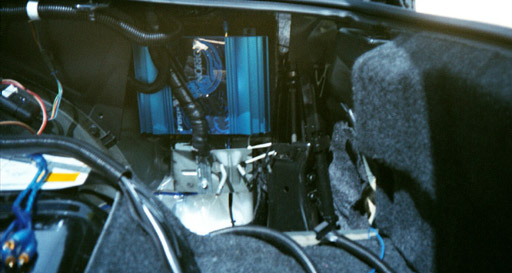
Mounting Amp BEHIND The Spare Tire:
There is actually enough room BEHIND The spare tire to mount another amp. The trick is to mount the amp BETWEEN the antenna mount and the rear quarter panel sheet metal without denting/dimpling the quarter panel.
Items Needed:
-1/2" thick carpet padding
-Electrical tape
-Spray adhesive.
-Materials to make and carpet an amp board.
-The 1st thing I did was make an amp board (Approx. 8"x11") out of 1/4" MDF and then carpeted it.
-Mount the amp securely to the amp board, and then cut off the extruding screws on the back.
-Cut out a piece of the 1/2" carpet padding to match the dimensions of the amp board and then use spray adhesive to attach it to the back side of the amp board.
-Cut a LONG 1" wide strip of the 1/2" carpet padding and then spiral wrap it around the antenna mount and then use the elctrical tape and spiral wrap it around the padding to make an EXCELLENT cushion around the antenna mount.
-Now that there is padding behind the amp board and the antenna mount also has an excellent pad around it, simply slide the amp into place. The padding on the antenna mount keeps the amp from getting damaged and the padding behind the amp board keep the rear quarter panel from getting dented/dimpled.
For an extra measure of safety to the quarter panel, I added a sheet of Dyanamat X-Treme to act as a secondary pad as well as hold the panel vibrations down. |
|
|
|